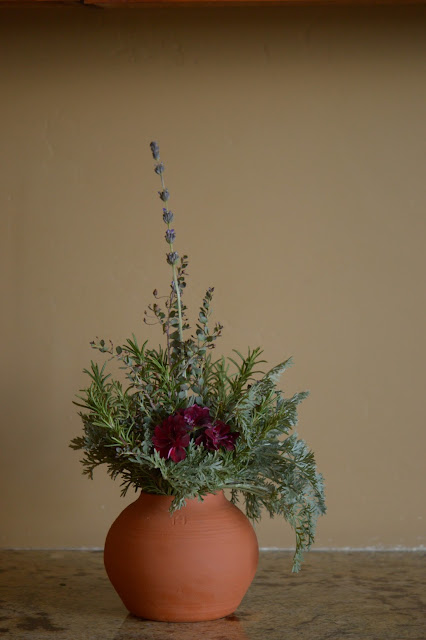
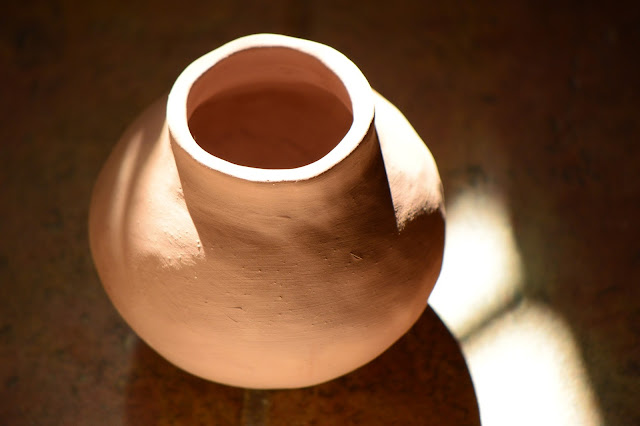
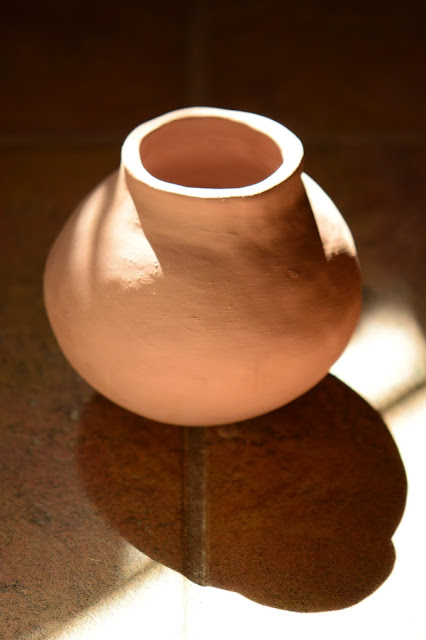
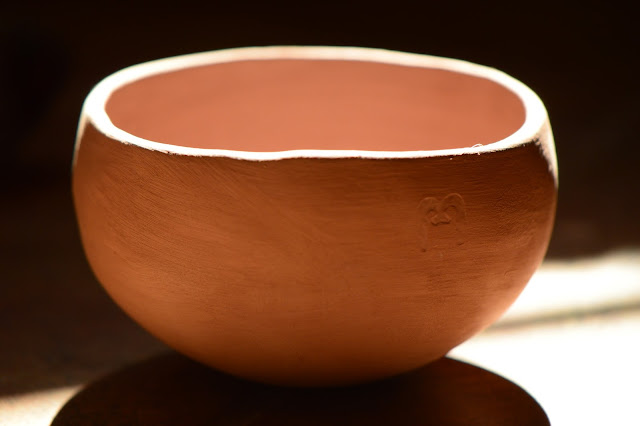
Using one of my earthenware pots for the Christmas flowers...
This pot was one of a series made last summer, wheelthrown and entirely unglazed. The rings created by the movement of fingers in wet clay are all left visible, especially along the shoulder.
Wishing all a happy Christmas!
Wednesday, December 23, 2015
Thursday, December 10, 2015
A Small Winter Moodboard From the Desert
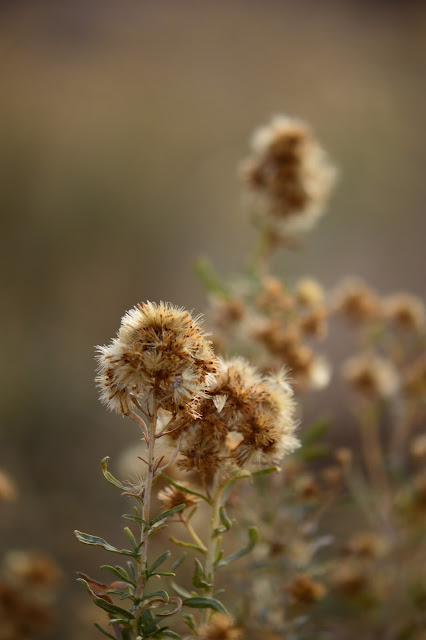
Enjoying inspiration from the rich brown seedheads of a wildflower... This is Rubber Rabbitbrush (Ericameria nauseousa), a denizen of the dry country West.
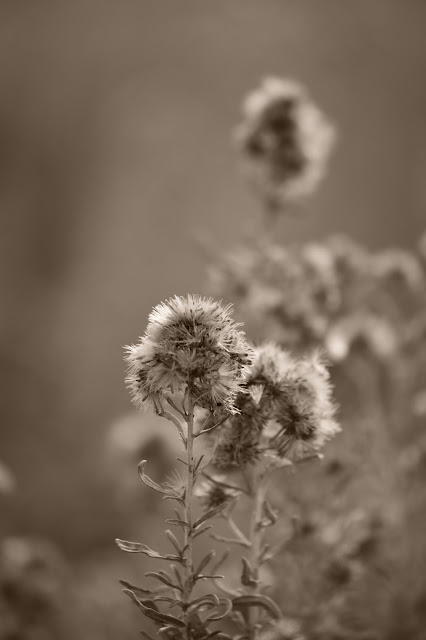
Also in monochrome, where its fine textures stand out against the winter desert sunlight...
For a look at the nearby wild Blue Palo Verde tree, see my garden blog post at A Small, Sunny Garden...
Also in monochrome, where its fine textures stand out against the winter desert sunlight...
Saturday, November 21, 2015
A Threesome
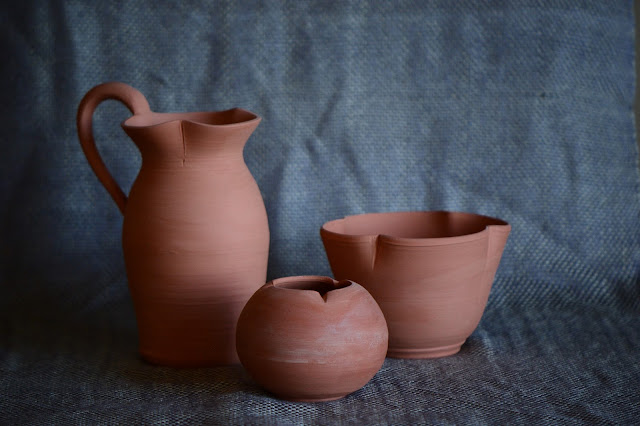
Here are three pieces inspired by classical Greek pottery, though none is a direct copy. One detail is that each is characterized by a trefoil or quatrefoil lip, sometimes used on the classical Oinochoes.
The pitcher is a graceful form at its best. This one has a slightly narrowed neck and flared rim which is then indented to create a functional pour spout.
The marks made by the wooden rib can be clearly seen where the clay is pressed inward.
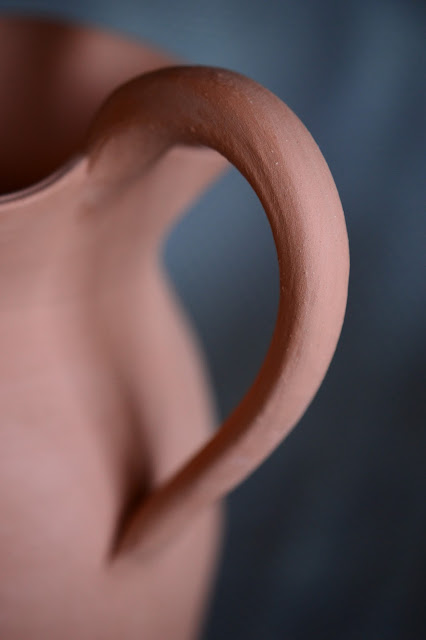
The foot is rolled, rather than cut, creating a softer edge. The handle is pulled: a technique unique in pottery, where a lump of moist clay is stroked and eased by the fingers into long, slender forms such as handles.
The larger pot in this small series has a flared, flower-like form finished by the quatrefoil rim. This gives it almost a fluted effect. On the exterior, the tool marks are again quite visible and make a sharp curve. Inside, the effect is softer.
The smallest pot was inspired by the suggestion that I make a piece based on the marvelous seedpods of a local desert plant: Hesperaloe parviflora.
It's probably a source I should try working from again; but here is the very simple pot that was made at that time.
Here it is, holding an assortment of flowers and some green Hesperaloe pods as well.
Just a brief look at some handthrown earthenware pieces I've made... Hope you've enjoyed them!
Note: The fabric used as background in most of these photos is some handwoven yardage I made as well. It is worked in plain weave, 100% acrylic thread in two colors.
Sunday, November 8, 2015
One Flowerpot
Recently out of the kiln: a pot created for one of my African violet plants (Saintpaulia).
Pot and saucer were handthrown on a potter's wheel. Clay used is a cone 8 buff-colored stoneware; and the glaze is my version of tenmoku, the classic old dark iron-brown glaze of Japan and China. I use a single fire sequence with this glaze, e.g. the piece is glazed in the raw clay stage, then fired slowly to full temperature, roughly 1249 C.
The pot was designed with a deep foot to hold the plant up out of the drained water, and it has notches in the foot to further facilitate drainage. As you can see, the violet in question is growing rapidly and was very much in need of a new pot!
Friday, November 6, 2015
The Way I Work...
 |
| beginning the poncho |
So yesterday saw a little planning, and this morning saw a little more, plus some knitting.
 |
| not shown: the tape measure! |
The rest to be in stocking stitch with a central panel of diamonds, bounded by - of course - a little more garter stitch.
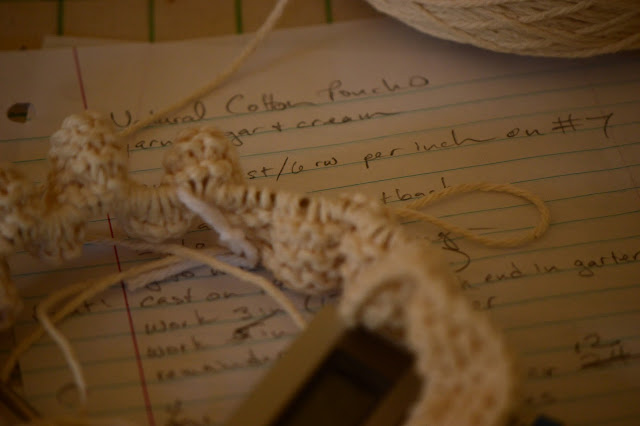 |
| my handwriting deteriorated years ago! |
 |
| that initial curly-cue phase... |
Tuesday, November 3, 2015
First out of the Kiln...
Here are some pieces from last week's firing.
For reference, the largest is about 7.25 in high (18.5 cm). All are unglazed.
The three pieces on the left are from my first attempts at making coiled forms, using methods gleaned from traditional New World pottery. The piece on the far right is a purely sculptural work (unusual for me) made for my sister; it was wheel-thrown (completely closed), then cut open to create the flared hood.
Happily, everything came through the fire quite well, including some test tiles with a brief experiment using pumice, red clay, and calcium borate. Tile #2 shows promise as an engobe...
For reference, the largest is about 7.25 in high (18.5 cm). All are unglazed.
The three pieces on the left are from my first attempts at making coiled forms, using methods gleaned from traditional New World pottery. The piece on the far right is a purely sculptural work (unusual for me) made for my sister; it was wheel-thrown (completely closed), then cut open to create the flared hood.
 |
| Photo by Sarah Myers, Copyright (C) Sarah Myers. Used by permission. |
Sunday, October 25, 2015
A Little Autumn Fashion
This will be the first post with any of my knitting. I completed this particular sweater earlier in the year, and it has been waiting for cooler weather, which is a long time coming here in the desert!
Technical Notes:
The sweater was worked in Berroco Modern Cotton, a worsted weight pima cotton/rayon blend. This yarn gave fairly sharp definition to the pattern stitches.
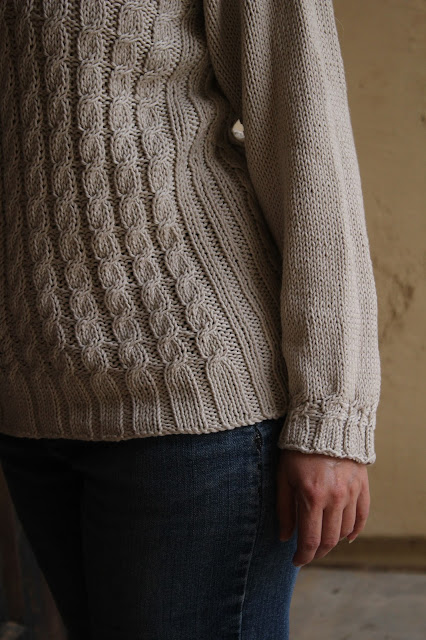
The design was developed with the idea of creating a layered effect: the cabled section opens to a honeycomb stitch yoke, which is then edged by the ribbed collar. Sleeves are worked in plain stocking stitch to allow emphasis to remain with the body of the sweater.
Construction details include a satisfactory experiment in working the sleeves directly by casting on at the armhole. There is a little shaping at armhole and shoulder (this latter done with short rows on the sleeve), but I doubt I would bother with this detail again; I think as good an effect would have been achieved without.
The piece was knit entirely in the round for convenience, though the pattern would not require this. I used knitted steeks at armholes and neck. Again, this was for convenience (dubiously, as I hate stitching steeks down!); the pattern could also have been worked flat.
Each side, front and back, consists of two panels of cables, meeting at a central, chained cable. In the front, this central cable is twisted and then parted to create the yoke. Along the edge of the yoke, the divided cable sections continue to be twisted outward.
In back the cables blend into the yoke that runs straight across, which then blends seamlessly into the collar.
The outer cables are carried to the shoulder and worked to form an accent at the armhole.
At the sides a series of ribbing keeps the texture from being too bulky.
One of my favorite discoveries on this project was a way to handle the cuff. At first I tried a normal ribbed cuff in which the number of stitches was reduced in order to draw the sleeve in at the wrist. I didn't think this looked good with the rest of the design so I ripped it out and tried a new idea. I cabled around (two twists) at the beginning of the ribbed section. This drew the sleeve in naturally with no need for stitch reduction and made a more elegant finish. If the ribbed section were longer, the cuff would flare back out, which might also be a fun way to work a sleeve design. But in this case I kept it fairly short.
The ribbing at the hem is simply the rib pattern used for the cables -- not yet cabled and worked on smaller size needles.
Happy Autumn!
A big thank you to my sister Sarah Myers for the photography!
All images in this post are copyright (C) Sarah Myers. Used by permission.
Wednesday, October 21, 2015
Breaking the Rules
It is axiomatic among potters that a glaze applied to unfired clay must contain an appreciable amount of clay itself. It is proverbial that the glaze should be applied before the piece has dried.
However...
In a test-in-progress I have here two free-standing test tiles (cut from a cylinder form) which have been glazed, while bone dry, with a glaze containing no clay whatsoever. The glaze surface has dried with no cracking and the tiles are very much intact.
I am greatly indebted to John Britt's book The Complete Guide to High-Fire Glazes for explanations which have allowed me to tackle the complexities of once-fire glazing while using my own clay and glazes. His brief section on once-firing (as opposed to an initial low-temperature fire, followed by a high glost fire) resolved what had been an intractable dilemma in my studio. Because, for me, the traditional advice was not working! More on that in a moment...
To expand on Britt's explanation from my own experience, one of the keys to addressing once-fired glazing is to begin, not with the nature of the glaze, but with the nature of the clay body in use.
If the clay is composed primarily of fireclay and is relatively non-plastic in working properties, then it is likely very fragile when bone dry and is most safely glazed when leather-hard -- the standard practice. However, if the clay runs high on ball clay and is quite plastic, it tends to have a much higher dry strength. This type of clay may well respond better to bone-dry glazing.
So for once-firing the first question to address is the nature of the clay. The second is to match the glaze to the selected glazing sequence.
The requirements for the glaze recipe itself, therefore, flow naturally from the clay in use. The necessary clay content in the glaze will depend on whether one is applying it at the leather-hard stage or after the piece has fully dried. In this case, the key issue is that of drying shrinkage. High clay content in the glaze (assuming one is using a slop glaze) makes for significant shrinkage as the glaze dries. This is desirable when the glaze is being applied to a piece that still has considerable moisture in it as it will allow both clay and glaze to shrink together. The important thing is to remember that the shrinkage rate of clay and glaze must be compatible -- whatever that rate may be.
Glazing a bone-dry piece, despite the fact it inevitably absorbs moisture and expands during the process, requires a glaze shrinkage closer to that normal for bisqued ware. Glazing a leather-hard piece will require considerably greater shrinkage in the glaze to avoid cracking during drying.
As I make not only my own glaze recipes, but also my own clay recipes, it has been very helpful to understand these details. My stoneware clay is highly plastic, with around 11% OM4 ball clay. It has phenomenal dry strength, of the sort that almost allows one to drop it on the floor without damage! Strength at leather-hard stage, however, is not high at all. For these reasons it makes much better sense to glaze it when fully dried, and I have been using a simple Tenmoku glaze (about 7 % kaolin) that would probably work well on bisque also.
The test tiles shown above are a more extreme test, revisiting my favorite white glaze. This is a high-feldspar type, containing plenty of Custer Feldspar as well as spodumene (to minimize crazing). At .52 by formula, it is already very high in alumina from the feldspars alone, and there is no reason to add any clay! I had always bisque fired before using it, but decided this time to test it on raw clay. As you can see, there was no problem applying it to my bone dry stoneware; no cracking has developed at all.
These tiles are part of a larger test to check behavior of my glazes in a slow cooling cycle following firing. I must go glaze the rest of the test pieces now...
 |
| This pot is glazed in my white feldspathic glaze using a normal cooling cycle. |
Wednesday, October 14, 2015
The Pot
Here is the completed pot, partially dried. It should be ready for firing soon. Now if only temperatures will drop low enough to allow us to heat the kiln! Anything over 95 F (35 C) makes for difficulties, and the heat has spiked into the lower 100s again here in the desert.
I've always judged my work partly by the shadow that falls across the interior (when applicable!). I'm fairly happy with this one. Now for more...
I've always judged my work partly by the shadow that falls across the interior (when applicable!). I'm fairly happy with this one. Now for more...
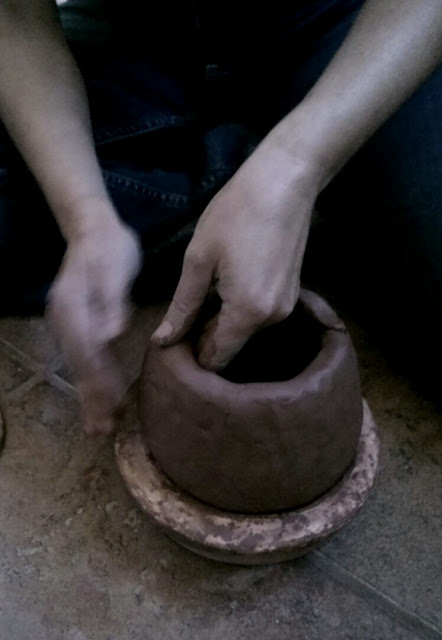
Hands at Work!
Sunday, September 27, 2015
Trying Techniques
So here they are: my first three pots made using the coiling method.
The initial attempt was, not surprisingly, a complete failure, but it was extremely useful as it revealed the main areas to be focused on.
Accordingly, my first completed pot was mainly a study in how to pull the form inward as the height increased. This is, of course, a prominent factor in wheel-thrown work, so I should have been prepared for the same need in coiling; however, the techniques used are - at first try, at least - considerably different. My beginner's version is a bit heavy-handed! But I did end up with a pot...
A rather lumpy piece, but the goal was achieved, along with learning to work with the requirements imposed by crafting the base in my mould.
The next piece was a continuation of the same aim; it also played with a more complex form.
Finishing the rim became a major issue on this one, and one which I did not solve to my satisfaction, but I was certainly pushing harder in this case. I also felt that I had not thinned or worked the walls to a suitable degree of plasticity; however, as the pot dried, I was pleased with the weight and overall "feel". This second pot gave me a stronger sense of what I needed to achieve in a more finished piece.
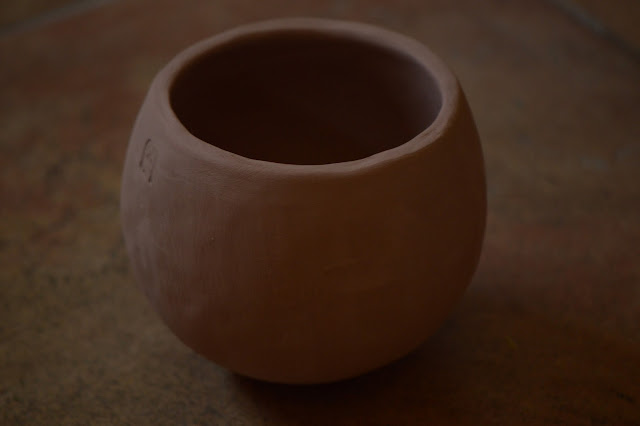
So with the third pot the form was simpler, but the piece was every way more satisfactory. It is getting much easier to produce a basic cylinder to commence the piece. Besides that, I thinned the walls and shaped the pot, not merely while coiling, but also by using a beating process as the clay dried a little. The result was a small bowl...
...one which I was finally willing to put my stamp on.
I wish I could express in the photographs the "touch" of these pieces. Somehow there is far more of the hands in them than I ever achieved in wheel-thrown work. It is warm, with a far more intimate acquaintance between hands and clay. It is a sensation that is likely to keep me working in this mode for quite a while...
The initial attempt was, not surprisingly, a complete failure, but it was extremely useful as it revealed the main areas to be focused on.
Accordingly, my first completed pot was mainly a study in how to pull the form inward as the height increased. This is, of course, a prominent factor in wheel-thrown work, so I should have been prepared for the same need in coiling; however, the techniques used are - at first try, at least - considerably different. My beginner's version is a bit heavy-handed! But I did end up with a pot...
The next piece was a continuation of the same aim; it also played with a more complex form.
Finishing the rim became a major issue on this one, and one which I did not solve to my satisfaction, but I was certainly pushing harder in this case. I also felt that I had not thinned or worked the walls to a suitable degree of plasticity; however, as the pot dried, I was pleased with the weight and overall "feel". This second pot gave me a stronger sense of what I needed to achieve in a more finished piece.
So with the third pot the form was simpler, but the piece was every way more satisfactory. It is getting much easier to produce a basic cylinder to commence the piece. Besides that, I thinned the walls and shaped the pot, not merely while coiling, but also by using a beating process as the clay dried a little. The result was a small bowl...
...one which I was finally willing to put my stamp on.
Subscribe to:
Posts (Atom)


